Category Archives: Linux

Fedora 16 KDE – First Impressions

A few days ago Fedora 16 was released. As a Fedora 15 user, I was eagerly awaiting this new release. The download is available here. This post captures my experience with the latest and greatest of Fedora.

Live System

This time, I had a pretty new computer at hand to try the live system on – an Intel Core i5-2310 2.9GHz Sandy Bridge processor with Intel HD Graphics 2000, 4 GB RAM and an LG DVD drive. I burnt the image on a DVD-RW and booted it. The boot process was a bit slow, the limitation being the DVD-RW. Once the live system was up, it was an absolute delight to use. It was fast and really stable, but with one problem. The supported screen resolution of 1280×1024 was not detected but rather set to 1024×768. Apart from this, there were no other problems.

On my laptop, a 4.5+ year old Dell Inspiron 6400 with an Intel Core 2 Duo T5300 1.73GHz with Intel 945 GMA and 2.5GB RAM, there was an error during boot stating that a bookmark couldn’t be saved. Not sure what this was, but, the desktop loaded successfully.

Installation

I went ahead and installed Fedora 16 on my Dell. The now familiar and straight forward installation took about 20 minutes to complete. This time I made one small change to the partitions and formatted my home partition with btrfs. I wanted to try first hand what the new file system is all about, despite being aware that it is not production ready, yet. Post installation, to my surprise, there were updates worth 175 MB. I went ahead and installed them.

Boot up and Shutdown

Boot time: 53 seconds with auto login.
Shutdown time: 13 seconds.

Software

KDE Platform version 4.7.3 is what this release is about, with Kernel version 3.1.1 (after the update) under the hood.

Fedora is known to provide only free software. The included software  reflects this philosophy. There is no Adobe Flash, Java or codecs. we have

  • KOffice
  • Konqueror
  • K3B
  • Kopete
  • Dragon Player
  • Amarok
  • Gwenview
  • Apper

However, adding the RPM Fusion repository, enables the installation of codecs and other non free software.

Desktop & Activities

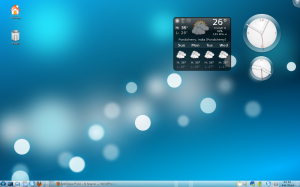
The desktop in Fedora 16 is clean and refreshing with a wallpaper to match its code name – Verne. The default desktop just has Home and Trash icons. On the panel there is the Kickoff menu and to its right is the Show Activity Manager  icon. To the far right are the notification area, system tray and the clock .

Clicking on Show Activity Manager icon reveals four pre-defined activities with what seems to be a welcome effort to simplify the understanding of Activities.

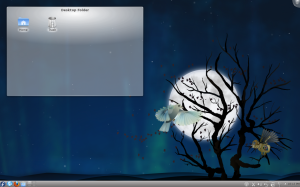
1. Desktop – The regular KDE desktop with a Folder View widget at the top left. This is the default activity.

Desktop

Desktop

2. Photos Activity – Displays the photos in the Pictures folder or any user defined folder.

Photos Activity

Photos Activity

3. Desktop Icons – The classic desktop which allows icons to be placed on the desktop.

Desktop Icons Activity

Desktop Icons Activity

4. Search and Launch – A netbook like interface with large icons allowing the user to – as the name suggests – search and launch applications. Favourite applications are displayed at the top bar.

Search And Launch

Search And Launch

The currently selected activity is displayed to the right of the Plasma (cashew) icon.

Another small but effective change is the introduction of breadcrumbs within Kickoff. Earlier it was necessary to navigate the menus and sub menus one level at a time. Now I can jump from any level to the top level with one click thus saving time.

Kickoff - Breadcrumbs

Kickoff - Breadcrumbs

There is an interesting change in Dolphin which deserves mention. The menu bar is hidden by default. I guess the aim here is to allow the user to focus on files rather than being distracted with menus and options. Those who cannot live without the menu bar, can enable it from the Configure and control Dolphin menu.

Dolphin

Dolphin

I am yet to try out desktop effects, so no comments on that area.

There were a couple of problems when booting into the desktop. At the first boot after installation, the splash screen just froze. I rebooted once again and everything was back to normal and the desktop loaded as it should. There were a few crashes immediately after, without any major interruption to my work. However, a day later, I am yet to see a crash.

Connectivity

The wi-fi connectivity set up during the live system carried over after the installation which was nice. In Fedora 15, sometimes wi-fi wouldnt connect automatically after boot, but that issue seems to have gone away now.

Bluetooth worked fine and I was able to browse the folders on my phone in no time.

Conclusion

Fedora 16 has delivered yet another smooth, stable, sleek and solid desktop experience with KDE.

On distributions which support the live system, it would be great if the files created on the live system home folder were carried over to some sort of guest user account valid for the next day or so. One example where this is especially helpful is taking screen shots during the installation and not losing them accidentally after the reboot 😉

Fedora 15 – Network Manager Update & Broken Wireless

An innocent update this weekend to my Fedora 15 (KDE) system broke the Wireless Connection. The culprits –  NetworkManager 0.8.9997-4.git20110620.fc15 and NetworkManager-glib 0.8.9997-4.git20110620.fc15. To make matters worse, anything I did within Network Manager crashed Plasma.

To fix this problem, I first setup a wired connection and then reverted both packages to their previous versions 0.8.999-2.git20110509.fc15, using this command

yum downgrade NetworkManager*

There is a forum link here which discusses this problem.

The official bug report: https://bugzilla.redhat.com/show_bug.cgi?id=716591

Fedora 15 KDE – First Impressions

A long time Mandriva user, I was distro-hopping for the past 6 months. I tried openSUSE 11.3, 11.4 and Fedora 14 – all in their KDE avatars. I couldn’t wait to try Fedora 15, which was released this week. I downloaded the KDE Live CD and copied it onto a USB stick using Unetbootin (I hate booting from a CD/DVD since it is terribly slow). Fedora booted up in less than a minute on my 4-year-old laptop and presented me a clean, pretty and solid desktop. After playing around a while, I decided on replacing openSUSE 11.4 KDE with Fedora 15 KDE.

Why KDE?

The big question first. I tried the new GNOME 3 on Fedora 15 Beta. First, my laptop didn’t have enough graphics capability to load GNOME 3 and fell back to the GNOME 2.x style desktop. Second, when I tried it on my brother’s computer, I found myself clicking more than required and I hate clicking twice when once should have been sufficient. GNOME 3 isn’t for me. I am planning to spend more time with it later, to check if I can use it as per my liking.

Hardware

An old Dell Inspiron 6400 with Intel C2D T5300 @ 1.73 GHz, 2.5 GB RAM and 10 GB for the root and 10 GB for the home partition with a GB for swap. Windows Vista resides in a 25 GB partition and my data in another 60 GB one.

Installation

The installation from the USB drive took about 15 minutes. It was pretty straightforward with standard questions like language, time zone, disk partitioning, root password and the like. Just before installing the boot loader, a message “Resizing partition /dev/sda1” popped up and put my heart in my mouth, but nothing untoward happened in the end.

Boot up and Shutdown

Fedora booted in about 50 seconds into a usable desktop. I have a single user setup and so this time includes auto login as well. It shut down in about 6 seconds.

Desktop

A customized Fedora 15 KDE Desktop

A customized Fedora 15 KDE Desktop

The desktop after the installation is clean with only an icon for the home folder and another for trash. On the panel, there is only the Kickstart menu to the left and the usual system tray and clock on the right. Of course, everything can be customized to either present a simplistic or fully loaded desktop feel. The wallpaper is slick and fresh, even-though I wondered  what the little golden thing on the bottom right of the tree is 🙂

Software

Here is a list of software that comes with Fedora 15 KDE from a user’s perspective, in addition to a host of other utilities.

  • KDE platform 4.6.3
  • KOffice
  • Konqueror
  • Dragon Player
  • Gwenview
  • digiKam
  • Kopete
  • K3B

Fedora sticks to free software and there are no codecs, flash or Java support in the default installation. These can be obtained by adding the RPM Fusion repos. I installed the following applications to make my desktop complete

  • Mozilla Firefox 4.0.1
  • Gstreamer codecs – Good, Bad and Ugly
  • VLC
  • GIMP

I have not yet installed one of the other Office Suites. Right now I don’t have a pressing need to create documents or presentations, so I kept installing office suites for another day.

My integrated Intel GMA wasn’t capable of running desktop effects. I turned on desktop effects only to be told that it was quite slow and hence temporarily disabled. I then disabled it permanently. It is nice to have desktop effects, but I hope I won’t miss it.

Update 1 – 28 May 2011: (Courtesy: comment by Arthur) To set up desktop effects that don’t get temporarily disabled, I followed these steps.

  1. Go to System Settings > Application Appearance > Style and select the Fine Tuning tab. From the Graphical Effects drop down select High Display Resolution and Low CPU and click on Apply button
  2. Click on Overview button to go back
  3. Go to Desktop Effects and select the General tab
  4. Check the Enable desktop effects box and click on Apply button
  5. Select the Advanced tab
  6. From the Compositing type drop down, select OpenGL and click on Apply button
  7. Select the All Effects tab and configure the effects you like
  8. Make sure the Blur effect is disabled

Connectivity

Wi-fi connectivity is a snap these days and I had no problems connecting to my router.

The Bluetooth adapter was not detected. So this was the only piece which did not work. I have to investigate this further.

Update 2 – 28 May 2011: The problem with Bluetooth seems to be pretty widespread and is documented in Bug 695588. The solution is to run the following commands in Konsole as root.

systemctl enable bluetooth.service
systemctl start bluetooth.service

KPackageKit

I must mention this. KPackageKit worked way better than it used to on Fedora 14 and openSUSE 11.4. It was buggy and behaved inconsistently earlier but now it is just fine, although it is a bit slow sometimes.

Conclusion

When I started my distro-hopping from Mandriva, I was of the impression that Fedora was going to be cumbersome to set up and unstable considering that it is cutting edge and needs to be tweaked quite a bit. But none of that was required. Fedora 14 was a solid release that reassured me to go ahead and install Fedora 15. I was not disappointed. So far, nothing has crashed or my laptop has not frozen. I find Fedora 15 far stable than openSUSE 11.3 and 11.4 and I intend to continue using it as my primary Linux system, unless Mandriva 2011 comes out and beats Fedora hands down.

‘shred’ your hard disk

When we buy a new computer or give away a hard drive to others or just trash our old computer, it is always a good idea to delete all the information stored on the hard disks. This is particularly important if the computer has been used for business purpose or storing critical personal data such as financial transactions or health records. Just formatting the disk does not help either. Data can still be recovered from a formatted disk. So we shred the data, just like we do with paper documents and files.

Shredding or wiping the disk basically means writing random data to the disk a few times so that the data previously held could not be recovered. The more times random data is written the more difficult it becomes to recover files. Each time random data is written is called a ‘pass’. The time taken to shred the disk depends on the size of the disk and the number of passes. Large disks with higher number of passes could take hours to complete.

There are several tools available to achieve this goal. Some paid, some free. One such free tool that is widely available is the ‘shred’ command in Linux. It is available in almost every distribution. I recently discovered this and put it to great use.  I used GParted Live CD for this purpose. On booting up the Live CD on the target system, issue the command

shred -vfzn 5 /dev/sda1

Replace /dev/sda1 with the appropriate drive.
This is the simplest form of this command.  Let use see what it does

shred – the command to shred
v – provides verbose output
f – force permission changes to allow overwriting
z – write zeros after final pass to mask shredding
n – number of passes to be made. If this option is not specified, three passes are made by default.

This is the result of the shred command on a test disk under virtual box.

shred command

'shred' command

The ‘shred’ command can also be used to securely delete individual files. For example

shred -vfz test.txt

There are few more options available for the ‘shred’ command which can be used to further tune how ‘shred’ works.

Install KDE SC 4.5 on Mandriva Linux Spring 2010

Now that KDE SC 4.5 is out, I went ahead and upgraded my Mandriva Linux Spring 2010 from KDE SC 4.4 to KDE SC 4.5. Though the process is pretty simple, here is a simple step by step guide to upgrade to KDE SC 4.5. Please note that there may be other ways, but these steps use just the GUI. No command line involved here. So here we go

Step 1: Selecting the mirror

  • Head here and select a mirror.
  • Select the one closest to your location.
  • Copy the URL of the mirror

Step 2: Add Media

  • Open the Mandriva Control Center by clicking “Configure Your Computer” from the menu.
  • Provide the root password when prompted
  • Click “Configure media sources for install and update
  • Select File > Add a custom medium
  • Enter the details in the “Add a medium” dialog and click Ok.
Add a Medium

Add a Medium

  • Close the “Configure Media” window by clicking Ok again.

Step 3: Updating your system

  • In the MCC, click “Update your system
  • Updates from the newly added repository will appear.
  • Apply the updates

Step 4: Login to KDE SC 4.5

After the updates have been downloaded and installed, logout and log back in
Enjoy

Mandriva Linux Spring 2010

Finally, I managed to install Mandriva Linux 2010 Spring. As usual, I installed the One version. Mandriva builds on its excellent tradition by producing yet another great release. Spring 2010 come with KDE 4.4.3 and the usual assortment of applications.

Mandriva Linux Spring 2010

Mandriva Linux Spring 2010

So far it has been a smooth ride except for one annoying problem. I am not able to shut down my laptop. I hear the logout sound being played but nothing happens after that. However, I am able to do so by logging out and then shutting down which is a bit of a pain. While I wait for a fix to this problem, I am going to check out how openSUSE 11.3 fares against Spring 2010

Mandriva Linux 2010 GNOME – Solid and Sweet

I had a quick look at the Mandriva Linux 2010 GNOME edition and it turned out to be great. Having used Mandriva Linux 2009 and 2009

Desktop

Mandriva Linux 2010 - GNOME Desktop

Spring GNOME, I was certain that this release is going to be as solid as stable as it ever was. The GNOME edition provides one of the best, stable desktop experiences. If KDE stands for innovation and glittering eye candy, GNOME is all about stability. It just gets out of your way when you work. Of course, you can also get all the eye candy by enabling Compiz. There is also new artwork in Steel blue and Mandriva has introduced a new Steel theme for the window decoration to go with it.

Here is a quick look at the other stuff.

Software

The 2010 release comes with the following software and more.

  • GNOME 2.28
  • Firefox 3.5.3
  • OpenOffice.org 3.1.1
  • GIMP
  • Empathy Instant Messenger

Pidgin has been left out in favour of Empathy. I am still not so comfortable using Empathy. Other than this, there are no other surprises. Mandriva’s control center is still the one stop shop for admin needs.

One problem I faced is that I could not install any Adobe AIR apps. They seemed to be failing and I was not sure why. This happened on the KDE edition as well and so nothing specific to the GNOME edition.

Conclusion

After running Mandriva Linux 2010 GNOME for a couple of days, I could say, Mandriva Linux 2010 GNOME edition is as stable as its predecessors with newer versions of popular software and makes a great desktop experience.

Screenshots

As usual, here are a few screenshots.

Mandriva Linux 2010 – Very Impressive

A couple of days ago, Mandriva released the new version of its operating system, Mandriva Linux 2010. I downloaded the One edition to

Mandriva Logo

Mandriva Logo

give it a spin. I have been running Mandriva GNOME since 2008 and I have been keeping track of the developments on the KDE 4.x series. This time around, I wanted to really use KDE as my primary desktop. Before I proceed further, here is a bit of background info.

Background

A few of days prior to the release, I had downloaded openSUSE 11.2 RC2 and Mandriva 2010 RC2 KDE versions just to check how they both compared against each other. The openSUSE screenshots looked slick and honestly, that is the one I tried first. I had it installed as my primary OS for a couple of days. A few minutes into using it, plasma crashed. Kopete could not connect to any IM service. I installed Pidgin and even that wouldn’t connect which was not acceptable. That said, openSUSE 11.2 is a definite improvement over how KDE was being implemented in its earlier releases.

Next up, I installed the Mandriva 2010 RC2 and the installation went smoothly. I did not have any issues as I had in openSUSE. The night before the release of Mandriva 2010, a huge 400 MB updated got me Mandriva 2010. However, I always prefer to have a clean install and so I began downloading the 2010 ISO.

Installation

The Live CD is the most popular medium for modern Linux distros and Mandriva’s Live CD was no exception. The Live CD booted much faster. The installation itself took around 15 minutes. The partitioning tool has been revamped a bit. I usually go for custom partitioning, so this change made no difference to me. I used ext4 for the root and home partitions. I have a Win 7 evaluation copy running on another partition and another FAT32 partition for data exchange between the two. The FAT32 to NTFS conversion is pending for sometime now.

Boot & Shutdown

The boot time has significantly reduced. There is one thing I personally dislike about the boot process. The progress bar that was displayed in the earlier releases has been swapped for an animated circle. This is not as informative as the progress bar. Yes, the flower background gradually becomes visible as the boot process progresses, but is no match for a progress bar in letting one know, how much more one has to wait before being able to use the system.

The shutdown is pretty quick too, but not as quick as Spring 2009 GNOME, which shutdown in about 5 seconds.

Desktop

On booting, there were a few updates. The default desktop theme is La-Ora even in the KDE edition just to keep the experience same

Mandriva KDE Desktop

Customized Mandriva KDE Desktop

across GNOME and KDE editions. I changed the theme to Oxygen and main menu to Kickoff. Initially when Kickoff was first introduced, I was totally against it considering how much time it took to locate a program, but now I am trying to get used to it.

Applications

There is not much change in the applications Mandriva bundles by default. Apart from the regular KDE apps, there is OpenOffice 3.1.1, Firefox 3.5.3 and GIMP 2.6.7. There is no K3B in the One edition, even though I would prefer it to be a part of the ISO image. Applications can be installed using the Install & Remove Software app and codecs can be installed after adding the PLF repository. I installed Flash, Java, VLC, VirtualBox and a couple of games. The Mandriva Control Center is, of course, the one stop shop for all configuration and administration activities in Mandriva.

I found yet another small problem in Install & Remove Software application. First I select a few packages and install. Once the installation is done, I select a few additional packages. This time, the installation will fail. The workaround is to close the Install & Remove Software app and open it again. I am yet to post this in the forum or file a bug report.

Conclusion

Mandriva, in my opinion, has the best KDE implementation around. They proved it once again with this release. The KDE edition is just awesome. I have not looked at the GNOME edition yet. Having used Mandriva’s GNOME edition for the past year and a half, I think that would be just as great. I am anyway giving it a spin in the coming days. I would definitely recommend Mandriva 2010 to any one who wants to get started with Linux or try out a great distribution.

My experiment with dark themes

There are two things that I have never changed in my Mandriva installation. They are the GTK theme and the Metacity window decoration. Mandriva’s default GTK theme, in my opinion, is one of the best default themes on a Linux desktop. Recently, I wanted to test how some of the dark themes measured against it. I would like to mention that I have a strong dislike for darker themes and this is one of the reasons I want to use it and see if I can come out good after a week or so. So, I embarked upon an experiment to use a top dark GTK theme and see how things work out after a period of a week or two.

I downloaded the Shiki-Colors GTK and Metacity themes and installed them. Shiki colors is one of the top themes on gnome-look.org. I already use the GNOME-Colors icon theme which is one of the best icon themes around. After all the setup, my desktop looked something like this.

My Desktop

My Desktop

As far as the experience was concerned, I breezed through Day 1 – the day I changed everything. However, on Day 2, as my laptop booted, I was a bit surprised first and then realized I had changed everything the previous day. Guess I have not got used to the dark theme yet 😉 . Let me see how it turns out at the end of the week

Add Facebook chat to Pidgin on Mandriva 2009.1

I would like to have all my chat accounts logged in from one place. If you are like me and would like to have Facebook chat support to Pidgin on Mandriva 2009.1, here are the steps.

1. Download the facebook chat plugin for Mandriva from here. Select the correct platform.

2. Install the plugin (normally by double clicking on it and choosing Install in the box that pops up). Enter root password if prompted

3. Start Pidgin

4. Go to Accounts > Manage Accounts > Add

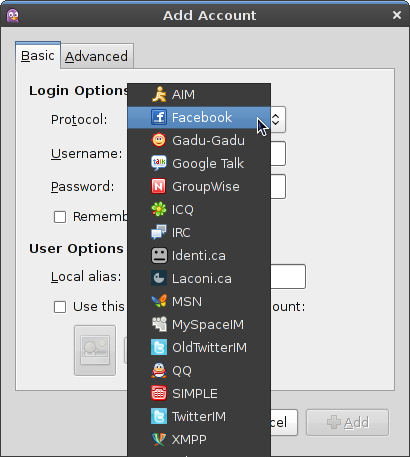
5. A new Facebook entry would be available under the Protocol list.

Facebook support for Pidgin

Facebook support for Pidgin